Quick start using Blender for video editing
Updated 2015-11-16 for WebM
Although it is mostly known for animation, Blender includes a non-linear video editing system that is available in all the current stable versions of Debian, Ubuntu and Fedora.
Here are some screenshots showing how to start editing a video of a talk from a conference.
In this case, there are two input files:
- A video file from a DSLR camera, including an audio stream from a microphone on the camera
- A separate audio file with sound captured by a lapel microphone attached to the speaker's smartphone. This is a much better quality sound and we would like this to replace the sound included in the video file.
Open Blender and check the properties
Launch Blender. Review the maximum memory size property. Set it to a value slightly less than the amount of physical RAM in the workstation. Setting it too low may slow down some operations in Blender. Setting it too high may take memory from other applications and lead to swapping.
Choose the video editing mode
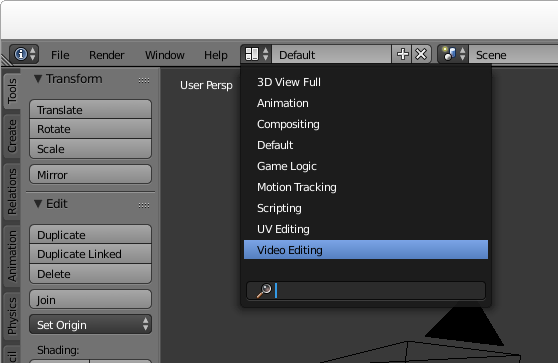
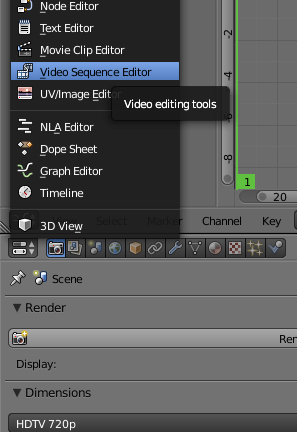
Choose the video sequence editor from the pull down menu at the top of the window:
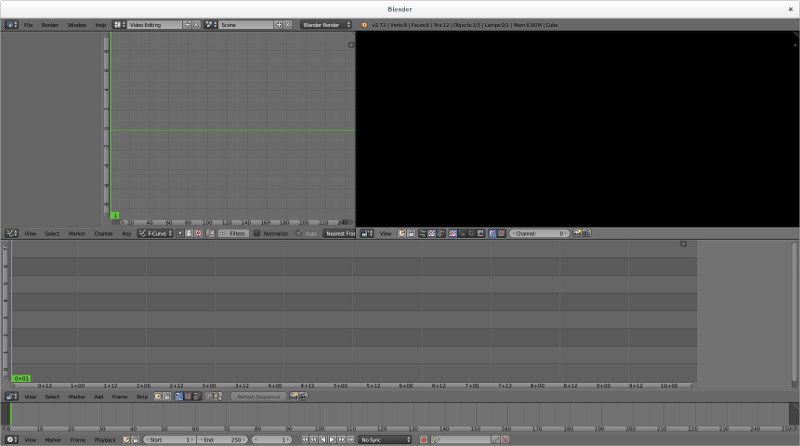
Now you should see all the video sequence editor controls:
Setup the properties for your project
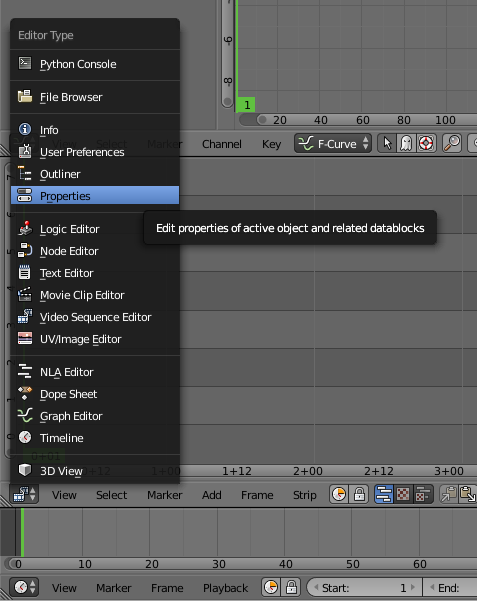
Click the context menu under the strip editor panel and change the panel to a Properties panel:
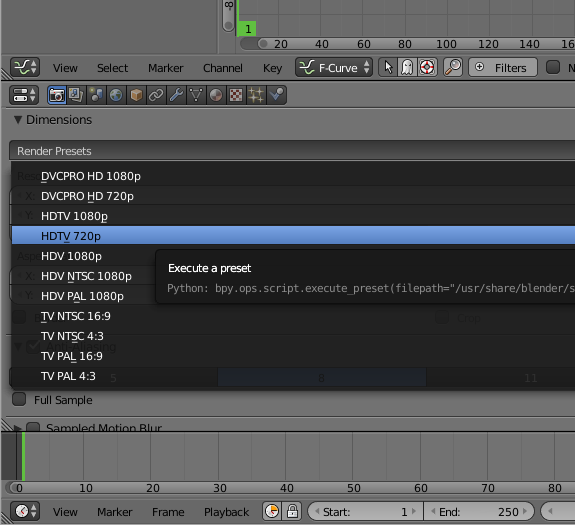
The video file we are playing with is 720p, so it seems reasonable to use 720p for the output too. Change that here:
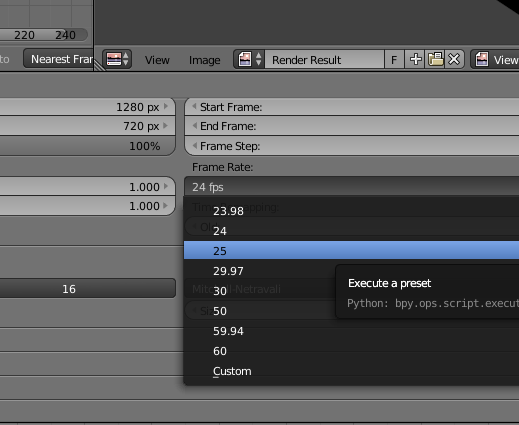
The input file is 25fps so we need to use exactly the same frame rate for the output, otherwise you will either observe the video going at the wrong speed or there will be a conversion that is CPU intensive and degrades the quality. Also check that the resolution_percentage setting under the picture dimensions is 100%:
Now specify output to PNG files. Later we will combine them into a WebM file with a script. Specify the directory where the files will be placed and use the # placeholder to specify the number of digits to use to embed the frame number in the filename:
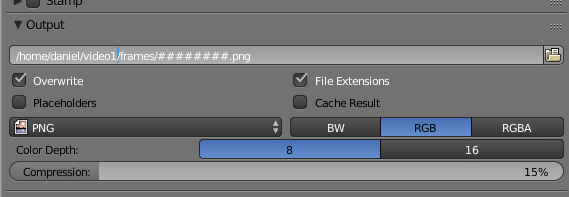
Now your basic rendering properties are set. When you want to generate the output file, come back to this panel and use the Animation button at the top.
Editing the video
Use the context menu to change the properties panel back to the strip view panel:
Add the video file:
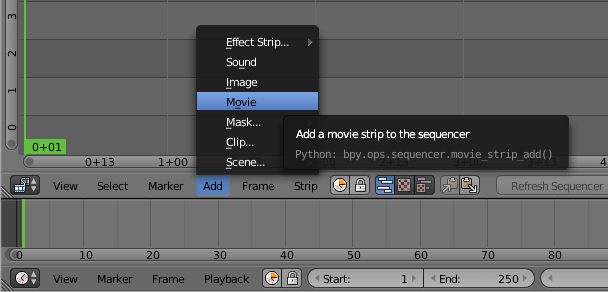
and then right click the video strip (the lower strip) to highlight it and then add a transform strip:
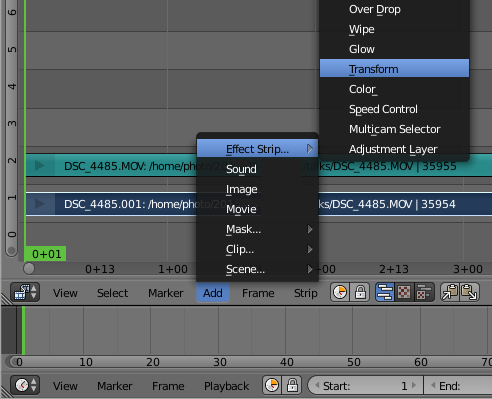
Audio waveform
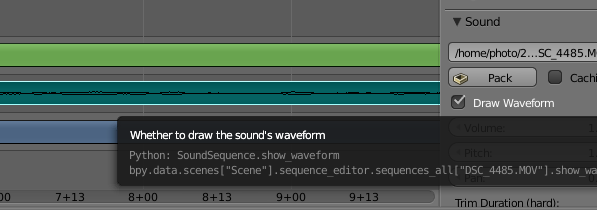
Right click the audio strip to highlight it and then go to the properties on the right hand side and click to show the waveform:
Rendering length
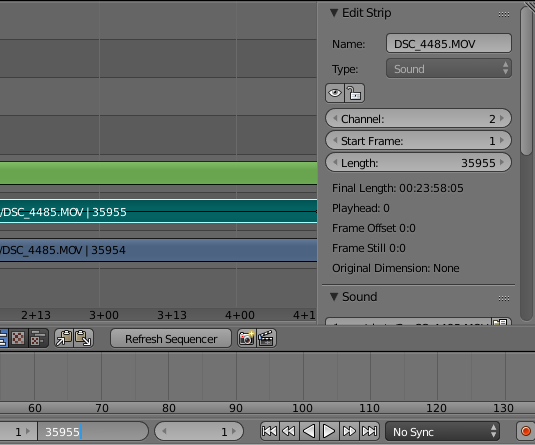
By default, Blender assumes you want to render 250 frames of output. Looking in the properties to the right of the audio or video strip you can see the actual number of frames. Put that value in the box at the bottom of the window where it says 250:
Enable AV-sync
Also at the bottom of the window is a control to enable AV-sync. If your audio and video are not in sync when you preview, you need to set this AV-sync option and also make sure you set the frame rate correctly in the properties:

Add the other sound strip
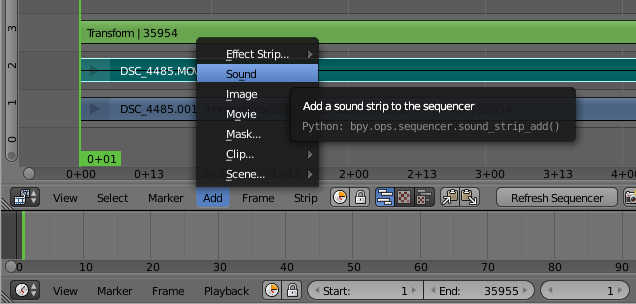
Now add the other sound file that was recorded using the lapel microphone:
Enable the waveform display for that sound strip too, this will allow you to align the sound strips precisely:
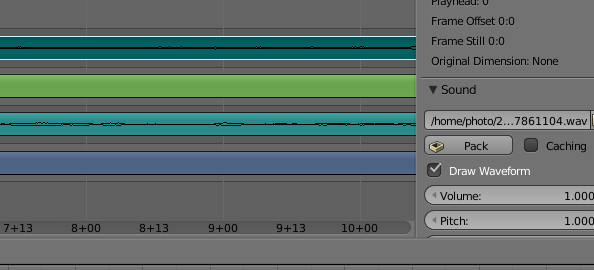
You will need to listen to the strips to make an estimate of the time difference. Use this estimate to set the "start frame" in the properties for your audio strip, it will be a negative value if the audio strip starts before the video. You can then zoom the strip panel to show about 3 to 5 seconds of sound and try to align the peaks. An easy way to do this is to look for applause at the end of the audio strips, the applause generates a large peak that is easily visible.
Once you have synced the audio, you can play the track and you should not be able to hear any echo. You can then silence the audio track from the camera by right clicking it, look in the properties to the right and change volume to 0.
Make any transforms you require
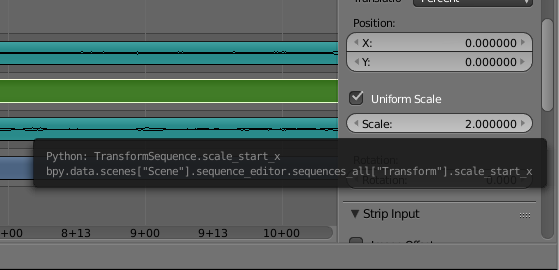
For example, to zoom in on the speaker, right click the transform strip (3rd from the bottom) and then in the panel on the right, click to enable "Uniform Scale" and then set the scale factor as required:
Render the video output to PNG
Click the context menu under the Curves panel and choose Properties again.
Click the Animation button to generate a sequence of PNG files for each frame.
Render the audio output
On the Properties panel, click the Audio button near the top. Choose a filename for the generated audio file.
Look on the bottom left-hand side of the window for the audio file settings, change it to the ogg container and Vorbis codec:
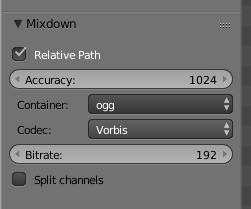
Ensure the filename has a .ogg extension
Now look at the top right-hand corner of the window for the Mixdown button. Click it and wait for Blender to generate the audio file.
Combine the PNG files and audio file into a WebM video file
You will need to have a few command line tools installed for manipulating the files from scripts. Install them using the package manager, for example, on a Debian or Ubuntu system:
# apt-get install mjpegtools vpx-tools mkvtoolnix
Now create a script like the following:
#!/bin/bash -e

# Set this to match the project properties
FRAME_RATE=25

# Set this to the rate you desire:
TARGET_BITRATE=1000

WORK_DIR=${HOME}/video1
PNG_DIR=${WORK_DIR}/frames
YUV_FILE=${WORK_DIR}/video.yuv
WEBM_FILE=${WORK_DIR}/video.webm
AUDIO_FILE=${WORK_DIR}/audio-mixed.ogg

NUM_FRAMES=`find ${PNG_DIR} -type f | wc -l`

png2yuv -I p -f $FRAME_RATE -b 1 -n $NUM_FRAMES \
    -j ${PNG_DIR}/%08d.png > ${YUV_FILE}

vpxenc --good --cpu-used=0 --auto-alt-ref=1 \
   --lag-in-frames=16 --end-usage=vbr --passes=2 \
   --threads=2 --target-bitrate=${TARGET_BITRATE} \
   -o ${WEBM_FILE}-noaudio ${YUV_FILE}

rm ${YUV_FILE}

mkvmerge -o ${WEBM_FILE} -w ${WEBM_FILE}-noaudio ${AUDIO_FILE}

rm ${WEBM_FILE}-noaudio
Next steps
There are plenty of more comprehensive tutorials, including some videos on Youtube, explaining how to do more advanced things like fading in and out or zooming and panning dynamically at different points in the video.
If the lighting is not good (faces too dark, for example), you can right click the video strip, go to the properties panel on the right hand side and click Modifiers, Add Strip Modifier and then select "Color Balance". Use the Lift, Gamma and Gain sliders to adjust the shadows, midtones and highlights respectively.