Recording live events like a pro (part 2: video)
In the first blog in this series, we looked at how to capture audio effectively for a range of different events. While recording audio appears less complicated than video, it remains fundamental to a good recording. For some types of event, like a speech or a debate, you can have quite a bad video with poor lighting and other defects but people will still be able to watch it if the audio is good. Therefore, if you haven't already looked at the previous blog, please do so now.
As mentioned in the earlier blog, many people now have high quality equipment for recording both audio and video and a wide range of opportunities to use it, whether it is a talk at a conference, a wedding or making a Kickstarter video.
The right camera for video recording
The fundamental piece of equipment is the camera itself. You may have a DSLR camera that can record video or maybe you have a proper handheld video camera. The leading DSLR cameras, combined with a good lens, make higher quality recordings than many handheld video cameras.
Unfortunately, although you pay good money to buy a very well engineered DSLR that could easily record many hours of video, most DSLRs are crippled to record a maximum of 30 minutes in one recording. This issue and some workarounds are discussed later in this blog.
If you don't have any camera at all you need to think carefully about which type to buy. If you are only going to use it once you may want to consider renting or borrowing or asking for other people attending the event to bring whatever cameras they have to help make multiple recordings (the crowdsourcing solution). If you are a very keen photographer then you will probably have a preference for a DSLR.
Accessories
Don't just look at the cost of your camera and conclude that is all the budget you need. For professional quality video recording, you will almost certainly need some accessories. You may find they are overpriced at the retail store where you bought your camera, but you still need some of them, so have a look online.
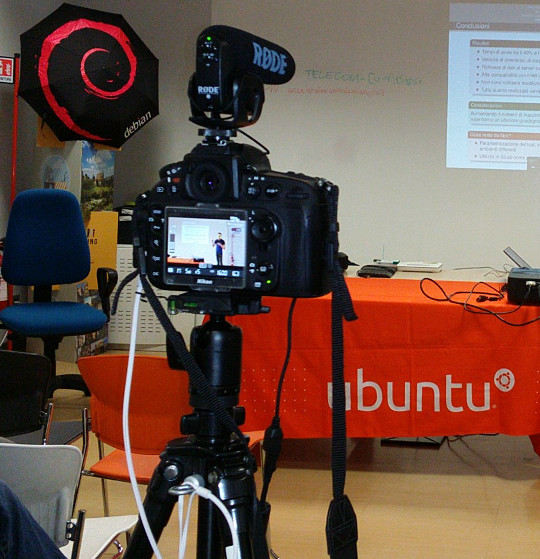 Recording a talk at a free software event with a Nikon D800 on a very basic tripod with Rode VideoMic Pro, headphones (white cable) and external power (black cable)
If you want to capture audio with the camera and record it in the video file (discussed in more detail below), you will need to purchase a microphone that mounts on the camera. The built-in microphones on cameras are often quite bad, even on the most expensive cameras. If you are just using the built-in microphone for reference audio (to help with time synchronization when you combine different audio files with the video later) then the built-in microphone may be acceptable. Camera audio is discussed in more detail below.
If your camera has a headphone socket, get some headphones for listening to the audio.
Make sure you have multiple memory cards. Look carefully at the speed of the memory cards, slow ones are cheaper but they can't keep up with the speed of writing 1080p video. At a minimum, you should aim to buy memory cards that can handle one or two days worth of data for whatever it is you do.
A tripod is essential for most types of video. If you use a particularly heavy camera or lens or if you are outdoors and it may be windy you will need a heavier tripod for stability. For video, it is very useful to have a tripod with a handle for panning left and right but if the camera will be stationary for the whole recording then the handle is not essential.
Carrying at least one spare battery is another smart move. On one visit to the Inca Trail in Peru, we observed another member of our group hiking up and down the Andes with a brand new DSLR that they couldn't use because the battery was flat.
For extended periods of recording, batteries will not be sufficient and you will need to purchase a mains power supply (PSU). These are available for most types of DSLR and video camera. The camera vendors typically design cameras with unusual power sockets so that you can only use a very specific and heavily overpriced PSU from the same company. Don't forget a surge protector too.
There are various smartphone apps that allow you to remotely control the camera from the screen of your phone, such as the qDslrDashboard app. These often give a better preview than the screen built-in to the camera and may even allow you to use the touch screen to focus more quickly on a specific part of the picture. A regular USB cable is not suitable for this type of app, you need to buy a USB On-The-Go (OTG) cable.
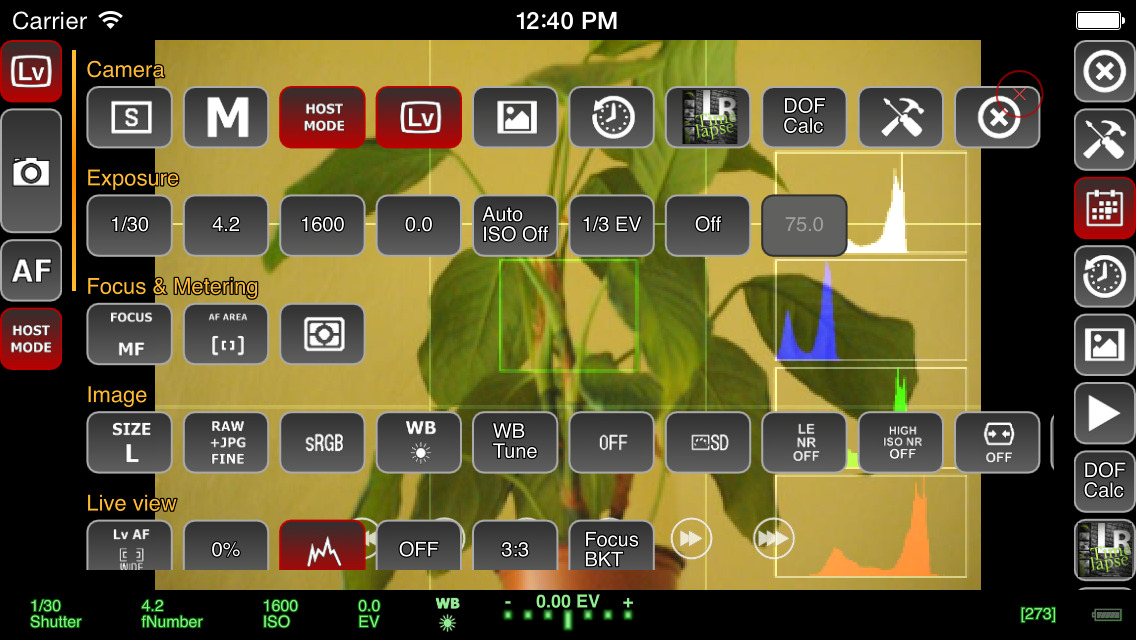 Screenshot of qDslrDashboard app on a smartphone, controlling a DSLR camera
If you plan to copy the video from the camera to a computer at the event, you will need to make sure you have a fast memory card reader. The memory card readers in some laptops are quite slow and others can be quite fast so you may not need to buy an extra card reader.
Camera audio
Most cameras, including DSLRs, have a built-in microphone and a socket for connecting an external microphone.
The built-in microphones obtain very poor quality sound. For many events, it is much better to have independent microphones, such as a lapel microphone attached to a smartphone or wireless transmitter. Those solutions are described in part one of this blog series.
Nonetheless, there are still some benefits of capturing audio in the camera. The biggest benefit is the time synchronization: if you have audio recordings in other devices, you will need to align them with the video using post-production software. If the camera recorded an audio stream too, even if the quality is not very good, you can visualize the waveform on screen and use it to align the other audio recordings much more easily and precisely.
If the camera will be very close to the people speaking then it may be acceptable to use a microphone mounted on the camera. This will be convenient for post-production because the audio will be synchronized with the video. It may still not be as good as a lapel microphone though, but the quality of these camera-mounted microphones is still far higher than the built-in microphones. I've been trying the Rode VideoMic Pro, it is definitely better than recording with the built-in microphone on the camera and also better than the built-in microphone on my phone.
One problem that most people encounter is the sound of the lens autofocus mechanism being detected by the microphone. This occurs with both the built-in microphone and any other microphone you mount on the camera. A microphone mounted on top of the camera doesn't detect this noise with the same intensity as the built-in microphone but it is still present in the recordings.
If using a camera-mounted microphone to detect the audio from an audience, you may need to have an omnidirectional microphone. Many camera-mounted microphones are directional and will not detect very much sound from the sides or behind the camera.
When using any type of external microphone with the camera, it is recommend to disable automatic gain control (AGC) in the camera settings and then manually adjust the microphone sensitivity/volume level.
Use headphones
A final word on audio - most good cameras have an audio output socket. Connect headphones and wear them, to make sure you are always capturing audio. Otherwise, if the microphone's battery goes flat or if a wireless microphone goes out of range you may not notice.
Choosing a lens
The more light you get, the better. Bigger and more expensive lenses allow more light into the camera. Many of the normal lenses sold with a DSLR camera are acceptable but if it is a special occasion you may want to rent a more expensive lens for the day.
If you already have a lens, it is a very good idea to test it in conditions similar to those you expect for the event you want to record.
Recording duration limits
Most DSLR cameras with video capability impose a 30 minute maximum recording duration
This is basically the result of a friendly arrangement between movie studios and politicians to charge an extra tax on video recording technology and potentially make the movie studio bosses richer, supposedly justified by the fact that a tiny but exaggerated number of people use their cameras to record movies at the cinema. As a consequence, most DSLR manufacturers limit the duration of video recording so their product won't be subject to the tax, ensuring the retail price is lower and more attractive.
On top of this, many DSLR cameras also have a 4GB file size limit if they use the FAT filesystem. Recording 1080p video at a high frame rate may hit the file size limit in 10 minutes, well before you encounter the 30 minute maximum recording duration.
To deal with the file size issue, you can record at 720p instead of 1080p and use the frame rate 24fps.
For events longer than 30 minutes or where you really want 1080p or a higher frame rate, there are some other options you can consider:
- Buy or rent a proper video camera instead of using a DSLR camera
- Using multiple cameras that can stop and be restarted at different times.
- Manually stopping and restarting the camera if there are breaks in the event where it is safe to do so.
- Use an app to control the camera and program it to immediately restart the recording each time it stops
- Extract the raw output from the camera's HDMI socket and record into some other device or computer. There are several purpose-built devices that can be used this way with an embedded SSD for storage.
- There are also some people distributing unofficial/alternative firmware images that remove the artificial 30 minute recording limit.
Camera settings
There are many online tutorials and demonstration videos on YouTube that will help you optimize the camera settings for video.
You may have already made recordings using the automatic mode. Adjusting some or all of the settings manually may help you create a more optimal recording. You will need to spend some time familiarizing yourself with the settings first.
The first thing to check is white balance. This tells the camera the type of lighting in the location. If you set this incorrectly then the colours will be distorted. Many cameras have the ability to automatically set the white balance.
For video, you may be able to change one or more settings that control the recording quality. These settings control the file compression ratio and image size. Typical image size settings are 720p and 1080p. Compression ratio may be controlled by a high/medium/low quality setting. Choosing the highest quality and biggest picture requires more space on the memory card and also means you reach the 4GB file size limit more quickly. A higher quality setting also implies a faster memory card is required, because the rate of megabytes per second written to the memory card is higher.
Next you need to think about the frame rate. Events that involve fast moving subjects, such as sports, typically benefit from a higher frame rate. For other events it is quite acceptable to use 24 frames per second (fps). Higher frame rates also imply bigger file size and a requirement for a faster memory card.
Once you have decided on the frame rate, the next thing to do is set the shutter speed. Use a shutter speed that is double the frame rate. For example, if using 24fps or 25fps, use a 1/50 shutter speed.
The final two settings you need to adjust are the ISO and aperture. Set these based on the lighting conditions and extent to which the subjects are moving. For example, if the setting is dark or if you are trying to record fast moving subjects like athletes, vehicles or animals, use an ISO value of 800 or higher. Once you have chosen ISO, adjust the aperture to ensure the picture is sufficiently illuminated. Aperture also has a significant impact on the depth of field.
Operating the camera: zoom and focus
Many people use zoom lenses. It is not always necessary to change the zoom while recording a video, you can use software to zoom in and out on individual parts of the picture when editing it in post-production. If you do change the zoom while recording, it may be more difficult to maintain focus.
Almost all lenses support manual focus (turning the focus ring by hand) and many support automatic focus.
When shooting photographs with a DSLR, the mirror is down and the camera can use dedicated sensors for focus and light sensing.
When shooting video, the mirror is up and the camera can not use the same focus sensors that are used in photography. Video recording uses a digital focussing algorithm based on contrast in the picture. If you take a lot of photos you are probably quite accustomed to the fast and precise autofocus for photography and you will notice that keeping a video in focus is more challenging.
As mentioned already, one of the first things you can do to keep focus simple is to avoid zooming while recording. Record in a higher resolution than you require and then zoom with software later. Some people record using 4k resolution even when they only want to produce a 720p video, as they can digitally zoom in to different parts of the 4k recording without losing detail.
If the subject is very stationary (people sitting at a desk for an interview is a typical example), you may be able to set the camera to manual focus and not change it at all while recording.
If you choose to enable autofocus while recording, any built-in camera microphone or microphone mounted on the camera is likely to detect sounds from the motorized focus system.
Ultimately, the autofocus mechanism is not accurate for all subjects and you may be unable to stop them moving around so you will need to change the focus manually while recording. It requires some practice to be able to do this quickly without overshooting the right focus. To make life more tricky, Nikon and Canon focus rings rotate in the opposite direction, so if you are proficient using one brand you may feel awkward if you ever have to use the other. A good way to practice this skill is to practice while in the car or on the train, pointing at different subjects outside the window and trying to stay in focus as you move from one subject to the next.
Make a trial run
Many events, from weddings right up to the Olympic Games opening ceremony, have a trial run the day before. One reason for that is to test the locations and settings of all the recording and broadcasting equipment.
If a trial run isn't possible for your event, you may find some similar event to practice recording and test your equipment. For example, if you are planning to record a wedding, you could try and record a Sunday mass in the same church.
Backup and duplicate the recordings before leaving the event
If you only have one copy of the recordings and the equipment is stolen or damaged you may be very disappointed. Before your event, make a plan to duplicate the raw audio and video recordings so that several people can take copies away with them. Decide in advance who will be responsible for this, ensure there will be several portable hard disks and estimate how much time it will take to prepare the copies and factor this into the schedule.
Conclusion
All the products described can be easily purchased from online retailers. You may not need every accessory that is mentioned as it depends on the type of event you record. The total cost of buying or renting the necessary accessories may be as much as the cost of the camera itself so if you are new to this you may need to think carefully about making a budget with a spreadsheet to do it correctly.
Becoming familiar with the camera controls and practicing the techniques for manual focus and zoom can take weeks or months. If you enjoy photography this can be time well spent but if you don't enjoy it then you may not want to commit the time necessary to make good quality video.
Don't rule out options like renting equipment instead of buying it or crowdsourcing, asking several participants or friends to help make recordings with their own equipment.
For many events, audio is far more indispensable than video and as emphasizing at the beginning of this article, it is recommended that you should be one hundred percent confident in your strategy for recording audio before you start planning to record video.